
In Microsoft Word


With Word 2003, you press the key combination Ctrl + P to open the Print dialog box. In the Print you choose Odd Pages to print the odd pages first. After printing is complete, flip the paper over canvas space and give back into the printer, open the dialog box Print and select Even pages to print to the even pages.
Note: you remember in the previous test to see page 2-3 in the 2nd dimension to accurate yet, avoid overwriting or printed in reverse.

In Word 2010 features in odd and even pages set in the menu File / Print / Print Odd Pages Only or File / Print / Print Even Pages Only to help you quickly get the option to print odd or even pages first.

In Microsoft Excel
Too bad because Excel does not support options in odd and even pages like in Word. But with Select Print Macro file is made available as well, the parity in the page also much more simple.
First you download this macro in the following link: http://www.mediafire.com/?dvb37u78hhjpb3t
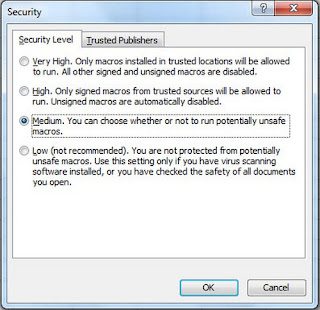
Open Excel and macros configured to work by going to Tools / Macro / Security , the Security panel tick Medium . Extract Select.zip Print and run Print Select.xla , select Enable Macros when the warning dialog box appears.


Now you choose to print the worksheet, press the Ctrl + Shift + P and enter the command in the instructions. This macro is useful with the ability to count the total number of pages in the sheet, more options in (print all, print and parity in the number of pages).
Hopefully, the above tips you can take advantage of the present paper in two, saving the amount of paper used, has helped the booklets become neat and tidy over.
Post a Comment